

This past weekend Michaels began putting out their selection of fall greenery and wreaths and while the calendar still reads June, it is never too early to start those autumn craft projects.
This Fall Scarecrow project is super simple, looks warm and welcoming sitting on your front porch or back yard even for those who have no floral arranging skills. I put mine around my home both inside and out. The outside Sam the Scarecrow sits beneath a black iron flag stand welcoming in autumn and guests. The inside scarecrow sits in my dining room for added fall color.
Here is what you will need to get started:
- 1 large clay flower pot. (you can use a smaller one if you want, but remember a scarecrow and flowers will need to fit in it)

- 1 scarecrow on a stake (pretty large if your going for the floor model project as shown. you can use a smaller flower pot and smaller scarecrow for a tabletop version)
- an assortment of silk fall leaves and flowers. Don't forget some sunflowers in your assortment
- wire cutters
- floral wire and tape (maybe)
- a hot glue gun
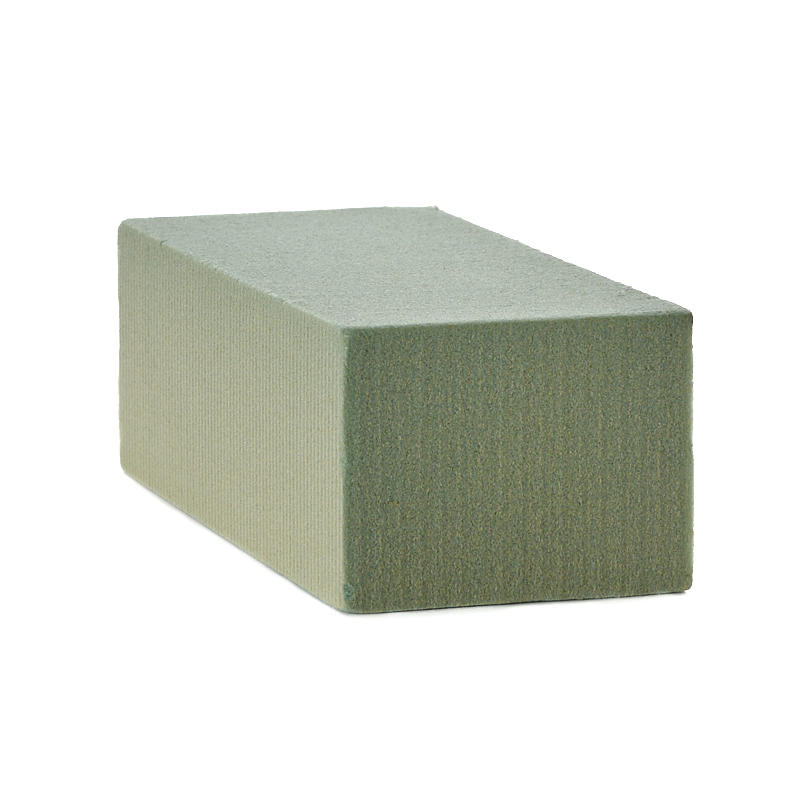
- enough green Styrofoam floral blocks to fill your pot. I stacked mine atop each other and I think I used three total.
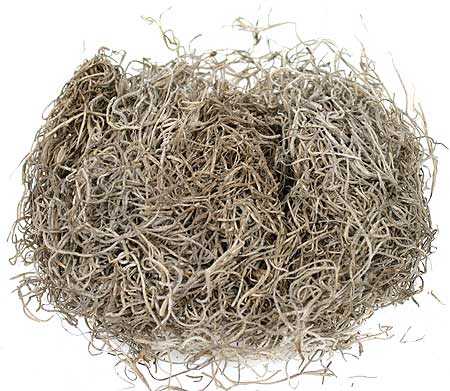
- Spanish moss ( if wanted. it's a great floral filler for the base to hide the Styrofoam and make it look full.)
Work on a table top. Start with the flower pot and take your first block of foam and place it long wise in the pot. The next two blocks should fit across the top of the pots snug. I always take a dry run with the foam to see how it fits before gluing them in.
The next thing I do I place a nice layer of Spanish moss across the top of the pot. It doesn't need to be thick, just enough to cover the foam.
The scarecrow will sort of sit on the edge of the flowerpot so you will need to check out how long the stake is relative to how deep a flower pot your are using. This is done by eye putting the stake next to the outside of the pot and if it is too long....you will need to clip off the excess.
Don't think about removing the stake entirely and just hot gluing him there....that stake will give the scarecrow stability to sit straight on the edge of the pot without flopping over onto the flowers or off of the pot.
Now take the stake with the scarecrow and insert him into the foam. It doesn't need to be on the edge....you can place him close to the middle. You will need to judge the distance yourself for the scarecrow size you have. Try not to poke him in and out of the foam too much as you will break it up and he won't be solid.
If its a tight fit, you can either hot glue his bottom a bit or not. I didn't need to as my first try landed him in a great position. I wanted my guys feet to set on the floor and they do. Test it out pre pot placing.
So now we have a clay flowerpot with this greyish mossy stuff and a scarecrow stuck in it.
The next thing I do is work the front. I get a feel for how I want his arms laid and bend them if needed. This is where I am going to start putting in flowers. I want it to look like he was sooo busy watching the sunflowers all day.... he just needed to sit for a while.
 |
Place the flowers in various heights, like nature does. There is no wrong way of doing it. You can glue down each stem you add if you wish. I try not to as I am usually never satisfied with placement and I move things around a lot. I don't use tacky glue or white glue for this project because if it gets wet it turns milky white and gets tacky again.

When I move to the back of the pot I start with leaves and fill the pot with those first. Some I leave in the bush they came in with just a few touches to spread them open and some I cut from the bush to place different colors and leaves with other bushes. Michaels and ACMoore stores offer a lot of dollar bushes....and so does Walmart now that I think of it....so you can really find a large assortment cheap if you look.
Now you can add your mum clusters and sunflower stems and all of those great floral picks with berries on them. Some bushes will be long enough to come up to the back of his hat and perhaps there will be a few stems you need to add length to. What I do is this. Sometimes I clipped the flower off of the bush for the size I needed leaving a bit of stump wire still attached to the bush and I use that. Or you may have floral flower picks {little green wooden stick with a piece of wire attached} all you really need is something long to wrap your too short flower stem to with the green tape. I do a lot of flower arranging so I always have green stumps here.

I like the look of a triangle for the back. Not a perfect triangle, remember, nature isn't perfect squares and triangles. Think of him as just sitting down in the sunflowers....(the ones he sat on will be beneath him)
But as you do yours, you will get the feel of what you want it to look like. Remember to turn the pot and check it out at all angles and sides.
I have a black crow that I put either on his shoulder or on his hat when I put him outdoors on a protected porch. Keeping in mind....if the scarecrow is cheaply made...and he gets wet from the rain...the inks in the face and clothes may run.
He is too pretty to be in the rain.
And you may also want to put a cute sign in his hand....Welcome Fall.... Autumn Greetings....or even welcome to the "smiths".

There are no limits to your creativity...it is in all of us, so don't be scared of this Scarecrow project.... After the first one or two you make....you will find your making them for gifts, donations to bazaars and to sell. I have made probably close to a hundred now.
If you have any questions feel free to ask and I will help you as best I can....Until next time...
Happy Crafting!
shared on blog: http://simpleandfuncrafting101.blogspot.com/
No comments:
Post a Comment
Note: Only a member of this blog may post a comment.